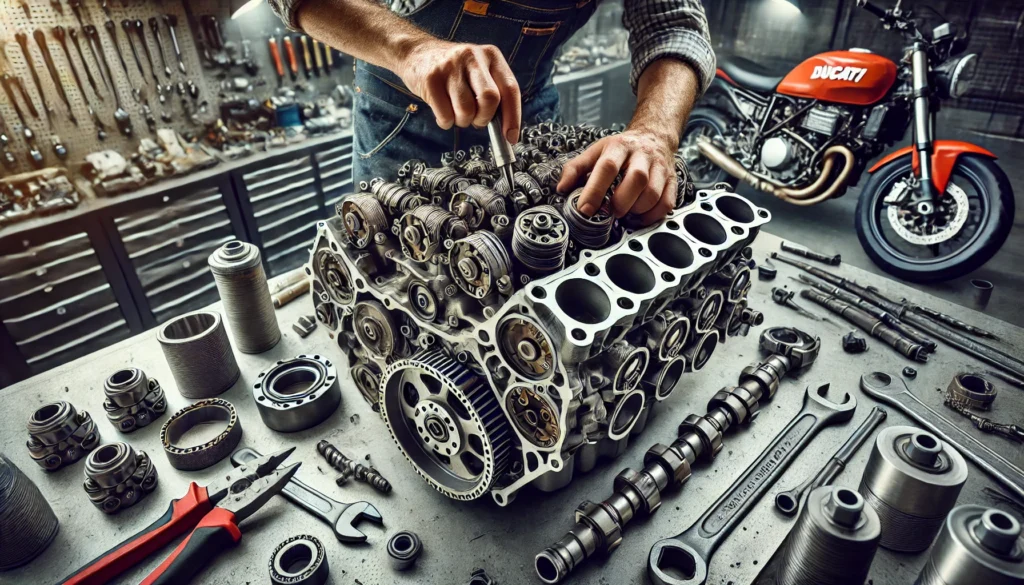
The Ducati Desmoquattro 4V engine is renowned for its innovative design and performance, making it a favorite among motorcycle enthusiasts. The engine utilizes a desmodromic valve system, a trademark feature of Ducati engines, which mechanically opens and closes the valves using cams rather than traditional springs. This setup, combined with the 4-valve per cylinder configuration, enables optimal airflow and engine efficiency. Whether you’re conducting routine maintenance, upgrading components, or performing a full engine rebuild, removing the Desmoquattro 4V engine head is a critical step in many projects.
This comprehensive guide will walk you through the essential steps required to successfully remove the engine head from your Desmoquattro 4V engine, including tools, preparation, and key considerations. By the end of this article, you’ll have a clear understanding of the process, ensuring that you can safely and efficiently perform this procedure.
Understanding the Desmoquattro 4V Engine Design
Before diving into the process of engine head removal, it’s important to understand the components and design of the Desmoquattro 4V engine. Ducati’s Desmoquattro system was designed to maximize performance by using four valves per cylinder (hence the “4V” designation). The four valves consist of two intake valves and two exhaust valves, allowing for more efficient combustion and improved engine breathing.
The desmodromic valve system is where Ducati’s engineering excellence truly shines. In a typical engine, the valve springs control the opening and closing of the valves, relying on compression and tension. However, in the Desmoquattro 4V engine, both the opening and closing of the valves are managed by camshafts. This ensures precise timing and eliminates the risk of valve float at high RPMs, a common issue in traditional spring-operated engines.
The Desmoquattro 4V engine is found in various Ducati models, including some of the most iconic motorcycles in Ducati’s lineup. These engines are celebrated for their high-performance capabilities, handling, and thrilling riding experience. Understanding this design will help you appreciate the complexities involved in removing and working on the engine head.
Why Would You Need to Remove the Engine Head?
There are several reasons why you might need to remove the engine head from your Desmoquattro 4V engine:
- Valve Maintenance or Replacement: Over time, valves can wear, warp, or become damaged. Removing the engine head allows you to inspect, clean, and replace valves, valve guides, and valve seals as needed.
- Cylinder Head Gasket Replacement: If you’re experiencing oil or coolant leaks, it may be necessary to replace the head gasket. Removing the Desmoquattro 4V engine head is the first step in accessing the gasket for replacement.
- Camshaft and Timing Adjustments: The camshafts in the Desmoquattro 4V engine control the opening and closing of the valves. If you’re modifying the engine or making adjustments to the timing, removing the head may be necessary to access and replace the camshafts.
- Engine Rebuilds: For a full engine rebuild or overhaul, you will need to remove the engine head to access the internal components, such as pistons, cylinder walls, and crankshaft.
- Upgrades and Performance Modifications: Many Ducati enthusiasts remove the engine head for upgrades such as new cams, porting the heads for improved airflow, or adding larger valves for increased power.
Regardless of the reason, understanding the procedure for removing the Desmoquattro 4V engine head is essential for performing these tasks efficiently and safely.
Read Also: Connect Tech COM-HPC Mini Carrier Board: A Comprehensive Overview
Tools Required for Removing the Desmoquattro 4V Engine Head
To properly remove the Desmoquattro 4V engine head, you’ll need a few specialized tools. Some of these tools are essential for ensuring that you do not damage any components during disassembly. The following list highlights the most important tools for this job:
- Torque Wrench: This tool is critical for ensuring that bolts are tightened to the correct specifications, preventing over-tightening or under-tightening.
- Impact Wrench: While not always necessary, an impact wrench can speed up the process of removing larger bolts, especially those that secure the timing belt and cylinder head.
- Socket and Wrench Set: A complete set of sockets and wrenches, including various extensions, will be needed to remove the bolts and components surrounding the cylinder head.
- Allen Wrenches: Many bolts in the Desmoquattro 4V engine will require Allen wrenches for removal.
- Valve Spring Compressor: If you’re planning to disassemble the cylinder head for valve work, a valve spring compressor will be necessary to remove and replace valve springs safely.
- Camshaft Locking Tool: This tool will help lock the camshafts in place while you remove other components, preventing unwanted movement.
- Gasket Scraper: You will need this tool to clean the gasket surfaces once the engine head has been removed.
- Plastigage: Used to measure bearing clearance, Plastigage is essential if you need to check the condition of the bearings while the engine is disassembled.
- Seal Puller: For removing any seals that may need to be replaced during the reassembly process.
Having these tools on hand will ensure that you can perform the Desmoquattro 4V engine head removal correctly and without causing damage to any components.
Step-by-Step Guide to Removing the Desmoquattro 4V Engine Head
1. Preparation and Safety Measures
Before starting the Desmoquattro 4V engine head removal, make sure that the motorcycle is securely placed on a stand to prevent it from tipping over. Disconnect the battery to avoid any electrical accidents and drain all fluids from the engine. This includes the oil, coolant, and fuel, if applicable. Removing the fuel tank and any other bodywork that might obstruct access to the engine is essential.
2. Remove the Timing Belts
The Desmoquattro 4V engine uses a timing belt system to operate the camshafts. To gain access to the cylinder head, the timing belts must be removed. Before doing so, ensure that the engine is at top dead center (TDC) to maintain proper timing when reassembling the engine.
- Start by removing the timing belt covers.
- Loosen and remove the tensioners for the timing belts.
- Carefully remove the belts, noting the direction of rotation and their condition for possible replacement.
- Be sure to mark the timing marks on the camshaft gears and the crankshaft to ensure proper alignment later.
3. Remove the Camshaft and Valve Covers
Once the timing belts are removed, proceed by removing the camshaft covers. These are usually secured with bolts or screws. Carefully remove these covers to expose the camshafts and the valve mechanism.
To prevent any damage, mark the camshafts and ensure that you know the orientation of each cam. This step is critical when reinstalling the cams, as any misalignment could lead to engine damage.
4. Loosen and Remove the Cylinder Head Bolts
The next step in the Desmoquattro 4V engine head removal process is to loosen and remove the cylinder head bolts. These bolts are typically torqued to a specific value, so it’s crucial to loosen them gradually in a crisscross pattern to avoid damaging the cylinder head or warping it.
Once all the bolts are removed, carefully lift the cylinder head off the engine block. If the head is stuck due to the gasket, use a soft mallet to gently tap it loose. Be sure to clean the surfaces thoroughly to prevent any debris from contaminating the engine.
5. Inspect the Engine Components
Once the Desmoquattro 4V engine head is removed, take the time to inspect the components beneath the head. Look for signs of wear or damage, such as scratched pistons, damaged valves, or excessive carbon buildup. This is also a good time to check the condition of the valve springs, valve guides, and seals. If you plan to replace any of these components, now is the time to do so.
6. Replace the Head Gasket
If the head gasket was leaking, or if you are rebuilding the engine, replace the head gasket with a new one. Clean the gasket surfaces on both the cylinder head and the engine block. Ensure that there is no debris or old gasket material left behind, as this can cause poor sealing when the head is reinstalled.
7. Reassembly and Final Steps
Reassembly is essentially the reverse of the disassembly process. Carefully install the Desmoquattro 4V engine head back onto the engine block, ensuring that the head gasket is properly aligned. Tighten the cylinder head bolts in the recommended sequence and to the correct torque specification.
Next, reinstall the camshafts, valve covers, and timing belts. Be sure to align the timing marks on the camshaft gears and the crankshaft to ensure that the engine’s timing is correct. Once everything is reassembled, refill the engine with oil and coolant, and check for leaks before starting the engine.
Conclusion
Removing the Desmoquattro 4V engine head is a complex but rewarding task that requires careful attention to detail. By following the steps outlined in this guide, you can safely and efficiently perform the head removal on your Ducati motorcycle. Whether you’re replacing valves, upgrading components, or conducting a full engine rebuild, this procedure is essential for maintaining and enhancing the performance of your Desmoquattro 4V engine. Always remember to consult your service manual for model-specific instructions, and take your time to ensure that every component is carefully inspected and correctly reassembled. With the right tools and a systematic approach, you can achieve a successful Desmoquattro 4V engine head removal and restore your Ducati to its full potential.


